
High-volume wood finishing shops face constant pressure to increase output without sacrificing surface quality. If you want to expand production capacity, reduce labor hours, and maintain a glass-smooth finish on millwork, optimizing your equipment is the most reliable step forward. HVBAN manufactures industrial fluid handling equipment engineered to handle demanding coatings like solvent-based and catalyzed lacquers with maximum precision.
If your finishing line currently struggles with orange peel, excessive overspray, or inconsistent film thickness, our technical engineering team can assist. Contact our technical sales division today for customized equipment configurations, distributor pricing, and direct machine recommendations for your shop.
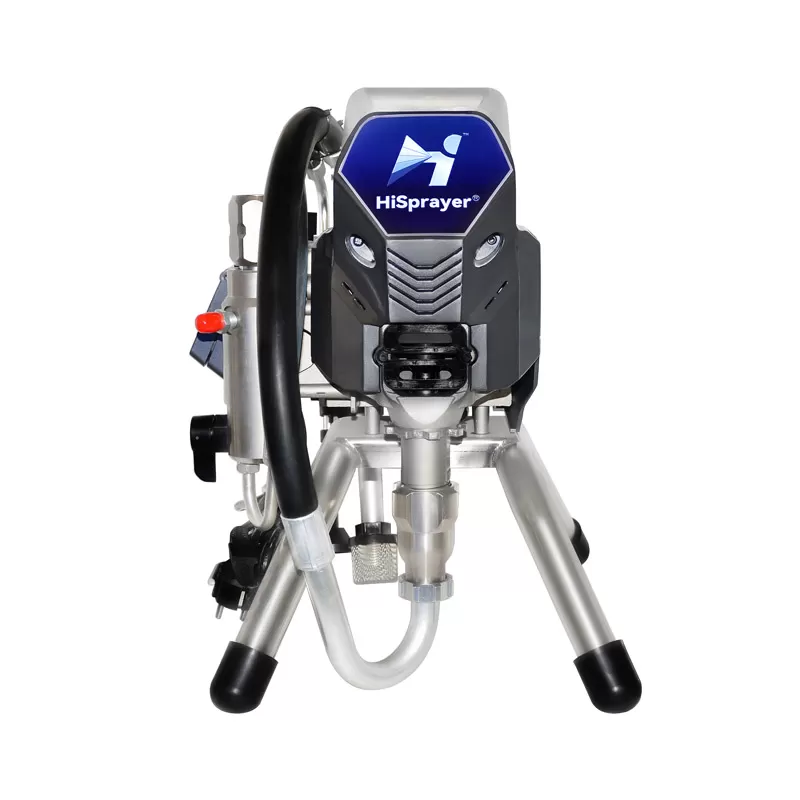
Can You Use an Airless Sprayer for Lacquer Finishing?
A common misconception in architectural millwork is that fine finishes require high-volume, low-pressure (HVLP) systems exclusively. While HVLP remains a staple for touch-ups and low-volume production, commercial operations rely on an airless sprayer for lacquer to maintain high daily square footage output.
Modern fluid dynamics and precision low-pressure tips have completely changed industrial wood finishing. With the correct setup, high-pressure piston pumps deliver factory-grade, furniture-quality finishes while operating at speeds standard pneumatic cups cannot match.
Production Efficiency: Airless Sprayer vs. HVLP for High-Volume Cabinet Shops
Cabinet manufacturing facilities live and die by their daily production rates. HVLP spray guns typically deliver between 0.3 and 0.8 gallons of material per minute, requiring continuous fluid refilling and multiple passes to build film thickness. This creates a severe production bottleneck in plants processing hundreds of cabinet doors per shift.
In contrast, using an airless sprayer for wood finishing allows an operator to coat between 800 and 1,500 square feet per hour. Standardizing on an airless system yields distinct operational advantages:
Sustained Fluid Delivery: Siphoning directly from 5-gallon pails or 55-gallon drums eliminates down-time spent refilling gravity cups.
Single-Pass Film Build: High fluid pressure creates a dense spray pattern that achieves wet mil targets in fewer passes.
Lower Labor Overhead: Operators cover vast surface areas, such as architectural wall panels and kitchen face frames, in a fraction of the time.
When evaluating airless vs HVLP for lacquer in high-volume settings, the airless method consistently wins on labor savings and square-feet-per-day capacity.
Fluid Characteristics: Managing Viscosity, Evaporation, and Atomization
Solvent-based lacquer behaves differently from heavy architectural acrylics. Standard lacquers contain fast-evaporating solvents, including ketones, esters, and aromatic hydrocarbons. These solvents flash off quickly once exposed to the atmosphere.
Because lacquer viscosity is inherently low (often between 18 and 24 seconds in a Zahn #2 cup), applying excessive fluid energy can destabilize atomization. If fluid pressure runs too high, the atomized droplets become exceptionally fine. The carrier solvents evaporate before the droplet hits the wood substrate, causing a dry, chalky surface known as dry spray.
Conversely, insufficient pressure leaves the paint stream poorly atomized, causing runs, sags, and severe orange peel. Controlling fluid pressure inside an airless sprayer for lacquer is the foundational step in balancing droplet sizing with proper solvent flash-off.
Optimal Fluid Pressure for Spraying Lacquer with an Airless Rig
The primary rule of commercial wood finishing is simple: use the lowest fluid pressure that yields complete atomization without tails. Over-pressurizing low-viscosity finishes destroys transfer efficiency, wastes costly coating material, and damages shop air filtration systems.
Recommended PSI Settings for Nitrocellulose (NC) and Catalyzed Lacquers
Different lacquer chemistries require specific fluid pressure windows. Traditional nitrocellulose lacquers flow out easily at lower shear, whereas acid-catalyzed conversion varnishes demand higher energy to split the fluid stream cleanly.
| Lacquer / Coating Type | Solids by Volume | Recommended Fluid Pressure (PSI) | Target Wet Film (Mils) |
|---|---|---|---|
| Nitrocellulose (NC) Lacquer | 15% – 22% | 800 – 1,100 PSI | 3 – 4 mils |
| Pre-Catalyzed (Pre-Cat) Lacquer | 22% – 30% | 1,000 – 1,300 PSI | 3 – 5 mils |
| Post-Catalyzed / Conversion Varnish | 30% – 42% | 1,200 – 1,600 PSI | 4 – 5 mils |
| Waterborne Acrylic/Alkyd Lacquers | 28% – 36% | 1,300 – 1,700 PSI | 3 – 4 mils |
Industrial diaphragm and piston pumps manufactured by HVBAN incorporate high-precision fluid regulators. These sensitive valves allow operators to hold steady fluid delivery in the critical 800 to 1,300 PSI band without sudden pressure spikes.
The "Lowest Pressure" Principle: Eliminating Overspray and Reducing Material Waste
To establish your target pressure, start with the pump regulator turned down completely. Aim the spray gun at a test panel of cardboard, pull the trigger fully, and observe the fan pattern. At very low pressure, you will notice thick fluid bands at the top and bottom of the pattern—commonly referred to as "tails" or "fingers."
Gradually increase fluid pressure by 50 PSI increments. Spray a quick test pass after each adjustment. The exact moment those heavy side margins dissolve into a uniform, feather-edged oval is your baseline running pressure.
Dialing in the lowest atomization pressure reduces bounce-back significantly. In a plant cycling through 40 gallons of clear coat per week, improving transfer efficiency by just 15% through pressure optimization preserves thousands of dollars in annual raw material stock.
Best Airless Spray Tip Sizes for Lacquer Application
Fluid pressure is only one half of the hydraulic equation. The spray tip controls fluid flow volume and fan width. Using an improper contractor-grade tip with lacquer will flood the target surface and ruin the work piece within seconds.
Fine Finish Low Pressure (FFLP) vs. Standard Contractor Spray Tips
Standard architectural spray tips utilize a single pre-orifice designed for heavy latex and elastomeric coatings. When processing low-viscosity clear coats, these standard tips generate severe misting and prominent edge striping.
Professional wood finishing requires double-orifice, Fine Finish Low Pressure (FFLP) tips. These specialized nozzles incorporate a dual-atomization stage:
Pre-Atomization Chamber: Breaks the high-pressure fluid stream into uniform micro-droplets before the coating reaches the exit aperture.
Final Orifice: Shapes the softened stream into a clean, tapered fan pattern.
Dual-atomization tips permit complete fluid break-up at up to 50% lower pressure than conventional nozzles. This softer spray pattern prevents edge pooling and helps clear coats flow together into an unblemished, mirror-flat film.
Sizing Chart: Matching Orifice Size and Fan Width to Furniture Components
Spray tip numbering uses a standardized code. The first digit represents half the fan width at a spray distance of 12 inches (a "3" indicates a 6-inch fan). The final two digits indicate the fluid orifice size in thousandths of an inch.
| Application Area | Recommended Tip Size | Fan Width at 12" | Fluid Flow Rate (GPM) |
|---|---|---|---|
| Turned Legs, Spindles, Small Trim | 208 or 210 | 4 inches | 0.07 – 0.11 GPM |
| Face Frames, Narrow Rails, Drawers | 308 or 310 | 6 inches | 0.07 – 0.11 GPM |
| Standard Cabinet Doors, Panels | 410 or 412 | 8 inches | 0.11 – 0.16 GPM |
| Large Table Tops, Architectural Slabs | 512 or 514 | 10 inches | 0.16 – 0.22 GPM |
For most interior cabinetry, a 310 or 410 FFLP tip provides the ultimate balance of film control and coverage speed without flooding profile details or recessed panel grooves.
Tip Wear and Flow Rate: Preventing Product Defects in Continuous Runs
Lacquer spray tips are wear items subject to abrasive fluid erosion. Even clear wood finishes contain flattening agents (synthetic silicas) and hard cross-linking resins that act like liquid sandpaper against tungsten carbide or diamond nozzles.
As a tip orifice erodes, two distinct changes occur:
The fluid orifice enlarges, delivering higher volume per second.
The fan width shrinks, concentrating the fluid onto a narrower path.
A worn .010" tip can easily erode into a .013" opening over 100 gallons of continuous work. That shift increases fluid discharge rates by nearly 70%. When an uncalibrated nozzle dumps that much excess volume, the coater experiences excessive film build, extended drying times, and mud-cracking on corner joints. Quality assurance managers must audit spray tips bi-weekly and replace worn units systematically.
Professional Setup Techniques for Industrial Lacquer Spraying
Applying solvent-based coatings through a high-pressure pump requires strict shop floor procedures. Liquid coatings forced through fine nozzles at 1,000 PSI generate considerable static electricity, creating an ignition hazard if safety protocols are neglected.
Static Grounding and Explosion-Proof Safety Protocols (Class 1, Div 1)
Spraying flammable lacquers indoors requires certified equipment. Standard electric airless paint pumps feature open-frame brush motors that produce continuous internal electrical arcs. These motors can ignite concentrated solvent vapor clouds.
For solvent-based wood lacquers, facilities should operate pneumatic airless pumps or intrinsically safe, explosion-proof electric rigs certified for Class 1, Division 1 hazardous environments. Always adhere to these safety requirements:
Mechanical Grounding Clamp: Affix a heavy-duty copper grounding clamp directly from the pump chassis to a true earth ground, such as a metal grounding rod or structural steel member.
Pail Grounding: Connect the metal material container to the pump frame with a conductive grounding wire. Never spray lacquer directly out of ungrounded plastic buckets.
Conductive Fluid Hoses: Use dynamic grounding lines featuring integrated static drain wires embedded inside the hose braiding.
Hose Configuration: Using 3/16" Whip Hoses for Ergonomics and Fluid Control
Most commercial contractors carry 1/4-inch or 3/8-inch fluid hoses on their rigs. While larger hose diameters are necessary to avoid pressure drops across 100-foot runs of exterior paint, they are cumbersome for wood finishing spray booths.
To optimize fluid control, link your main line to a 5-foot or 6-foot, 3/16-inch whip hose right before the spray gun. This downsized whip line delivers tangible mechanical improvements:
Eliminates Wrist Torque: A flexible whip hose moves freely, letting the spray technician maintain a perpendicular gun position across recessed parts.
Stabilizes Hydraulic Surging: The narrow hose internal diameter acts as a fluid dampener, smoothing out minor pressure oscillations from reciprocating piston strokes.
Manifold and Gun Filter Mesh Selection to Prevent Lacquer Nibs
A flawless gloss or satin surface requires contaminant-free fluid paths. Particulate contamination ruins cabinet surfaces, demanding labor-intensive color sanding and re-coating.
Fine finish setups require multi-stage filtering:
Suction Strainer: Install a fine-mesh metal basket on the pump intake tube to block dried skin chunks from bulk containers.
Pump Manifold Filter: Run a 100-mesh manifold filter inside the main pump housing to trap fine particulate early in the fluid path.
Handle Filter: Seat a 100-mesh to 150-mesh handle filter directly inside the gun handle.
This progressive filtration ensures that only completely liquefied, clean clear coat reaches the fine spray tip, eliminating nozzle clogs and avoiding surface nibs.
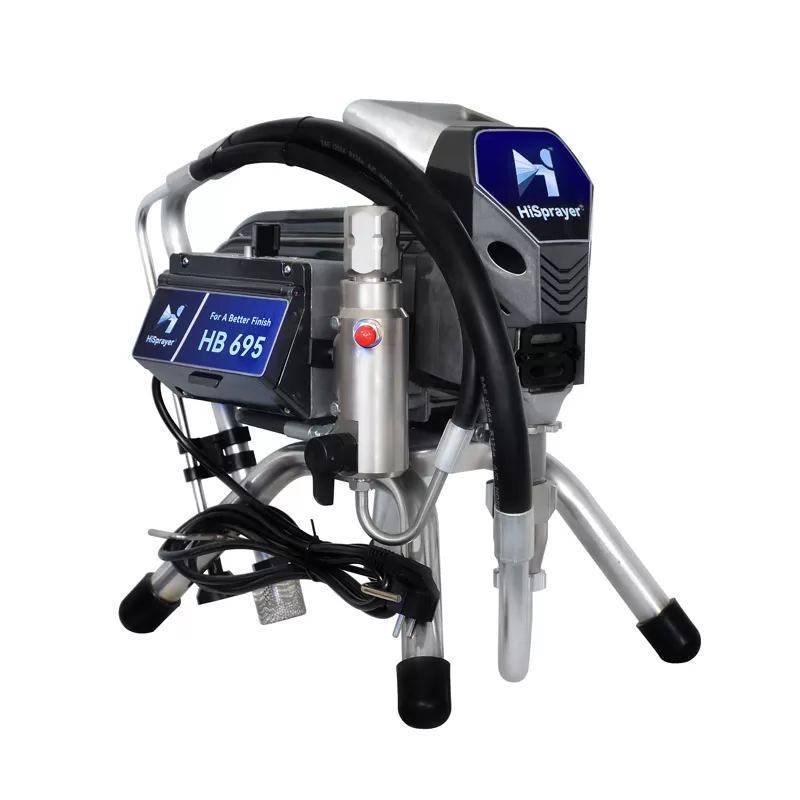
Strategic Comparison: Airless vs. Air-Assisted Airless (AAA) for Cabinetry
When engineering wood finishing production lines, shop managers routinely weigh high-pressure airless units against Air-Assisted Airless (AAA) systems. Both systems use hydraulic fluid pressure to atomize materials, but they balance output and transfer efficiency differently.
Capital Expenditure (CapEx) and Finish Quality Trade-Offs
Standard airless rigs operate via pure hydraulic force. Air-assisted airless configurations combine lower hydraulic fluid pressure (typically 400 to 700 PSI) with an auxiliary stream of regulated compressed air (10 to 30 PSI) fed directly into the air cap to soften and refine the fan margins.
| Performance Metric | Standard Airless Sprayer (with FFLP Tip) | Air-Assisted Airless (AAA) Rig |
|---|---|---|
| Transfer Efficiency | 50% – 65% | 65% – 78% |
| Application Speed | Very Fast (Up to 1.5 GPM) | Moderate to Fast (0.2 – 0.5 GPM) |
| Initial Equipment Cost (CapEx) | Lower investment | Moderate to High investment |
| Utility Requirements | Direct Electric or Air Drive | Continuous High-CFM Clean Air + Fluid Pump |
| Maintenance Complexity | Single fluid line; low complexity | Dual fluid/air hoses; precise balancing needed |
| Ideal Finish Application | Large fixtures, cabinets, high-volume production | High-end custom furniture, intricate profiles |
For large production runs involving flat-panel architectural panels, standard airless rigs paired with modern FFLP tips deliver output rates that triple standard AAA production, keeping initial capital investments significantly lower.
Troubleshooting Common Airless Lacquer Spraying Defects
Keep this operational troubleshooting checklist on your finishing floor to address coating issues quickly:
Micro-Bubbling and Solvent Pop:
Root Cause: Excessive fluid pressure aerates the lacquer, or heavy wet mil thickness traps evaporating solvent beneath a flashed surface skin.
Solution: Reduce pump fluid pressure by 100–150 PSI. Thin the finish using a slower-evaporating solvent (such as butyl cellosolve or high-flash naphtha). Apply thinner wet coats.
Heavy Edges or Tails (Fingers):
Root Cause: Fluid pressure is set below the atomization threshold for the lacquer's current viscosity, or the spray tip orifice is plugged.
Solution: Increase fluid pressure step-by-step. If pressure is already near maximum limits, swap to a tip with a smaller orifice size or thin the fluid by 5% to 10%.
Dry Spray and Rough Texture:
Root Cause: Gun distance is too far from the substrate (over 12 inches), or atomization pressure is excessively high, causing carrier solvents to vaporize mid-air.
Solution: Maintain a strict 8-to-10-inch standoff distance. Drop fluid pressure to reduce shear and droplet surface exposure.
Runs and Sags:
Root Cause: Spray tip orifice is too large, the operator's travel speed is too slow, or overlapping spray passes exceed 50%.
Solution: Step down from a .012" orifice to a .010" or .008" orifice. Increase your manual pass speed and maintain an exact 50% fan overlap.
Frequently Asked Questions
Q1: Do I need to thin lacquer before running it through an airless
sprayer?
A1: Most commercial industrial lacquers run straight from
the container without thinning if you use an airless pump with the correct fluid
pressure. However, if you notice edge tails at normal operating pressures, or if
high shop ambient temperatures cause premature solvent flash-off, reducing the
viscosity with 5% to 10% lacquer thinner helps balance the spray pattern.
Q2: Can I use standard architectural tips to spray clear
coats?
A2: No. Standard contractor tips (such as 517 tips commonly
used for interior wall paints) push too much volume and create coarse
atomization when paired with thin clear coats. You must use dedicated Fine
Finish Low Pressure (FFLP) tips sized between .008" and .012" to achieve smooth,
defect-free lacquer surfaces.
Q3: How do I thoroughly clean lacquer out of my airless
sprayer?
A3: First, relieve system pressure completely. Pull the
suction tube from the material pail and flush the system with clean, compatible
solvent thinner until the discharge runs clear. Remove and hand-scrub the gun
filter, manifold filter, and spray tip using a soft-bristle nylon brush and
clean solvent. Store the pump filled with an approved storage fluid or clean
mineral spirits to protect the internal fluid seals.
Q4: Why does my lacquer finish exhibit severe orange peel when using
an airless pump?
A4: Orange peel usually points to incomplete
droplet atomization or fast solvent flash-off that prevents wet droplets from
flowing out. Confirm that your fluid pressure is high enough to eliminate
pattern tails, verify you are using an FFLP tip, and ensure the workpiece is not
positioned in direct, turbulent airflow from a spray booth makeup fan.
Q5: Can I spray waterborne lacquers using the exact same airless
setup as solvent-based lacquers?
A5: Yes, but waterborne lacquers
generally exhibit higher viscosity, surface tension, and solids content. You
will typically need to run pump fluid pressure 200 to 400 PSI higher than
solvent products, and step up to a slightly larger tip size, such as a 312 or
412 FFLP nozzle, to achieve complete fluid atomization.
Partner with HVBAN for Industrial Coating Systems
Selecting the right fluid handling setup protects your shop floor against costly surface imperfections, recurring downtime, and material waste. HVBAN manufactures durable pneumatic and electric airless spray equipment engineered to meet the rigors of modern wood finishing production lines.
Whether you need to upgrade an existing production cell or configure an entire commercial finishing line, our engineering team is here to assist. Request an industrial quote from HVBAN today to speak with a fluid handling specialist about your production goals.